New! Easy-Mount Replacement Prints: One Frame, Many Stories
One of the hardest choices when working on a framing project is: what photograph will I choose? In the case of typical custom framing, when you frame the image, that’s it, there’s no going back. It’s like a marriage. That print is going to be in that frame till death do you part. (Okay I’ll stop with the analogy there). So when I started Saw & Mitre Frame Company I set out to make framing a lot simpler for photographers. Not just the one time framing but I envisioned a frame that allowed myself and others to quickly and easily change the prints. That’s why I’m really excited to bring to you these new prints that we’ve been working on that will allow you to simply change the photographs in your Saw & Mitre frame. One frame, many stories...
Here’s how it works.
The Prints: We have designed print templates for each of our frames. Your photographs are then printed to allow you to easily slip the print into the frame. No mounting involved! (see images below). Prints are fulfilled by the experts over at White House Custom Color and shipped directly to your door.
How to Order: Just order the print size that matches the Saw & Mitre frame you have (measured by the matt opening on the frame). Upload your image file through the website or email your image to prints@sawandmitre.com and we'll take it from there. It will arrive at your doorstep several days later.
Easy Mounting Instructions:
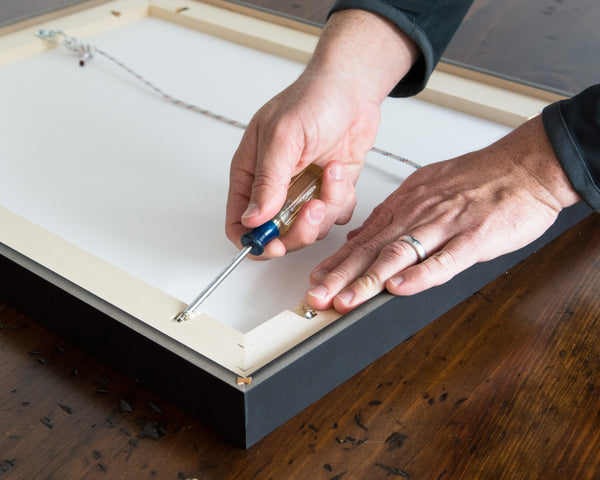
Step 1: Place the frame on a clean, flat surface. You'll also need a phillips head screwdriver. To minimize dust make sure to wipe off the table of any dust before starting.

Step 2: Unscrew each of the screws from the strainer on the back of the frame.

Step 3: Lift the backing of the frame out leaving the front matting and clear acrylic untouched. Remove the current print and slide the new print in. Place the backing back down in the frame.

Step 4: With one hand firmly press down on the strainer to ensure a tight fit of the strainer and artwork into the back of the frame. Then carefully insert each of the screws into the back of the frame. Make sure not to overtighten the screws. Just screw until you feel a slight resistance from the wood.
Step 5: Once all the screws are inserted back into the frame, give the strainer a tug at several points to ensure that it is attached securely to the back of the frame.

Step 6: You're done! Your frame is ready to hang!
- A quick note about dust. Dust is a framers worst enemy. When framing your work in the Saw & Mitre workshop we take great pains to ensure that your frame is as dust-free as possible by using industrial strength air compressors and specialized acrylic cleaners. When doing this at home you likely don't have a spare air-compressor sitting around, however there are a few simple ways to keep your frame dust free. First, when doing the print switch don't wear overly fuzzy clothes such as a fleece jacket or sweater. This causes unnecessary dust particles floating around near your frame. Second, use canned air to quickly blow out the area between the frame and print then quickly place the foamboard and strainer back into the frame.
Shop the Easy Mount Prints Now!
Have any questions? Email us at info@sawandmitre.com
Leave a comment
Please note, comments must be approved before they are published